Nutrico
Nutrico - Nutrico Services Webflow Template
- created: 09/03/2023
- by: PreyanTechnosys
- www.preyantechnosys.com
Introduction
Happy to have you here
We are glad to have you here, whether you have just purchased nutrico Template or are just taking a look. As you may be aware, Webflow—a potent no-code tool for building websites—is the foundation around which Concept nutrico Services is built. If you are already accustomed to it, modifying this template should be simple.
This documentation covers general rules of working with Webflow that we thought are worth sharing.
If you are new to Webflow
On the other hand, if it's your first time using Webflow, you might want to have a look at Webflow university and their 101 crash course.
Styling
Below you can find some general rules regarding styling your template.
Colors
Color Swatches is the template we utilised for handyman services. This implies that you may alter the colour of one element, and all the components that use the same swatch will receive the new colour. to swap out the colour swatches:
- Click on the element with the color you want to edit.
- In the styles tab on the right, find the color option (ex. Text color)
- Click on the color square.
- Once the little pop-up opens, click the edit icon and choose a new color.
- Click save.
See the video below for mini-tutorial.
Fonts
- Selecting "Body"
- In the styles tab on the right, click selector and select "Body (All pages)"
- Scroll down to "Typography" and change for the desired font.
See the video below for mini-tutorial:
- Selecting heading type you want to edit
- In the styles tab on the right, click selector and select "All H(1, 2, 3) Headings"
- Scroll down to "Typography" and change for the desired font.
Icons
All of the icons are in the .svg format, so changing the Color Swatches on the website will not affect them. You can download these icons from the "Assets -> Icons" tab, and edit them in your design software (Photoshop, Figma, Sketch etc.). You can also upload your own icons directly.
Editing
Below you can find some general tips on editing template's copy and images.
Static content vs. dynamic content
When it comes to copy, in Webflow we distinguish two different copy types - static content and dynamic content (CMS).
To quickly distinguish these copy types you can have a look in the navigator tab, where static content will be displayed using white font.
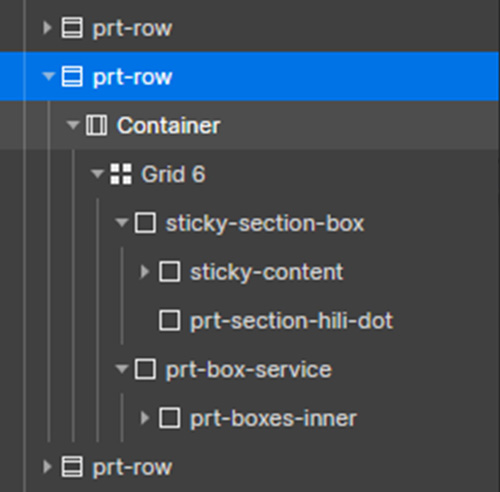
And dynamic content will be displayed using as body font color.
And dynamic content's border will be body.

Editing static content
Every copy, but the CMS related one, is a static content. It means that you need to edit it directly on the page.
You can edit static content in two ways:
- In the "Designer mode" simply double click on the text you want to edit, and change it. Webflow will autosave it for you.
- In "Editor mode" similarly click on the text and change it.
Check the video below to see how to edit static content in the "Designer mode".
Editing dynamic content
Editing dynamic content is very easy, but can be a little confusing at the beginning. This type of content you will need to edit through collections. Once you get it, it's as simple as filling in the web form.
To edit dynamic content:
- Go to CMS Collections on the left side, and find the collection you want to edit (ex. projects).
- Click on the collection item (ex. specific project).
- Change the inputs that you want to edit (ex. project name)
- Save and it's done.
Editing (static) images
There's two different image types used in this template - normal image and background image. You might notice that we used normal images mostly for icons, and the big images are implemented as a background image.
To edit normal image:
- Find the image you want to change and select it.
- In settings tab on the right click replace image and choose the new one.
To edit background image:
- Find the element with the background image (ex. Section, Div) and select it.
- In styles tab, scroll down to the background image settings and click on the image settings.
- In the little pop-up select "choose image" to select a different image.
Have a look at the video below to see how to edit background image.
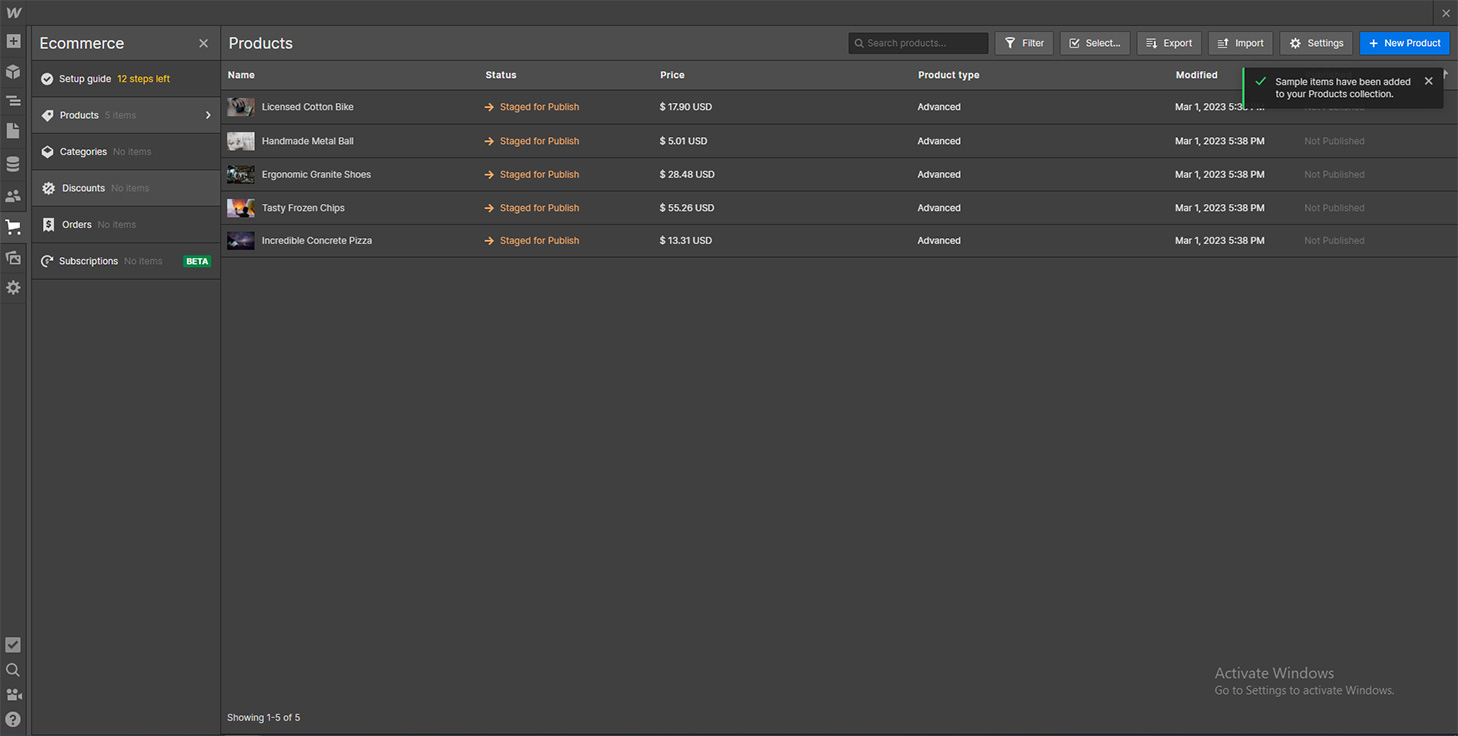
Editing products (eCommerce)
Editing your eCommerce products is very similar to editing dynamic content.
To edit your products:
- Go to "Ecommerce" and click on "Products". Find the product you want to edit and select it.
- Once in the product edit all the fields you want.
- Save and it's done!
Support
Thank you for purchasing Nutrico webflow template. If you have any questions that are beyond the scope of this help file, feel free to contact us via our Support ticket system. We will do our best to answer you in shortest of time (24-48 hours usually).
FAQ
How to find purchase code?
The purchase code is a code that verifies that you are a genuine buyer. Here are steps to find your purchase code : Purchase Code