Theme Installation
Installing the theme
Assuming that WordPress website is already set (for setting up WordPress blog refer to WordPress set up documentation at http://codex.wordpress.org/Getting_Started_with_WordPress#Installation), the next step is to install the theme. There are 2 main ways to upload the theme:
We recommend that you contact your web hosting service provider to make sure that your server PHP configuration limits are as follows:
max_execution_time 120memory_limit 128Mpost_max_size 32Mupload_max_filesize 32M
If you are running unmanaged dedicated server or VPS,
you should check your php.ini file. Alternatively, you can edit .htaccess file in the root of your website and add the following values:
php_value max_execution_time 120php_value memory_limit 128Mphp_value post_max_size 32Mphp_value upload_max_filesize 32M
Option 1: Via FTP client
Use an FTP client such as FileZilla, FireFTP or Cyberduck (if you are a Mac user) to connect to your hosting account. Navigate to where WordPress is installed and locate the /wp-content/themes/ directory.
Find the zip file called "inoterior.zip" in downloaded file, unzip it and upload the folder to the folder /wp-content/themes/.
Note: Please make sure that the main files of the theme are contained within just one folder.
Thus, the right way to locate your theme files is for example /wp-content/themes/inoterior/ but not /wp-content/themes/inoterior/inoterior/.
After all file uploaded, just go to Admin > Appearance and activate inoterior theme.
Option 2: Through the native WordPress theme uploader (not recommended due to big size of theme)
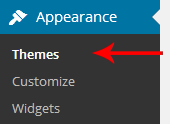
Select Appearance > Themes
Plugin Installation
Installing required plugins
After theme activation, you will get message to install some required plugin like this:

Now click on "Begin installing plugins" link and you will be redirected to "Install Required Plugins" page.
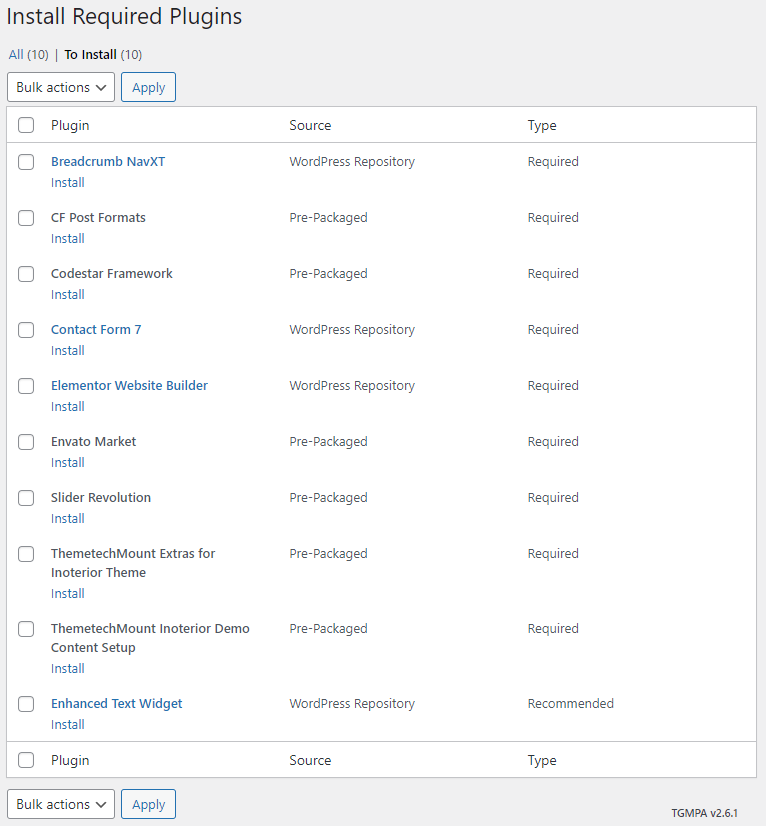
Note: Please make sure you install the ThemeTechMount Extras for Inoterior Theme plugin as this plugin is required to make our theme fully working.
Click on "Install" link below each plugin name to install plugins. Also make sure you activate all plugins. Here are details of each plugin:
- Breadcrumb NavXT: This plugin generates locational breadcrumb trails for your WordPress powered blog or website. These breadcrumb trails are highly customizable to suit the needs of just about any website running WordPress.
- CF Post Formats: This will show you post format as tab view when creating new post for blog. This will help you to add different Post Format based posts.
- Codestar Framework: This is required plugin for this Inoterior theme. The Theme Option section of theme is built on core of Codestar Framework, so please install this plugin to enable Theme Options section of theme. Also all Metaboxes (for Page, Posts etc) are built on core functionality of this Codestar Framework, so please install this plugin so that all Meta boxes work fine on your site.
- Contact Form 7: This plugin generates different contact forms easily.
- ThemetechMount Inoterior Demo Content Setup: This is required plugin for this Inoterior theme. The One Click Demo Content setup process is handled by this plugin. If this plugin is not Installed / Activted on your site the One Click Demo Content setup process will not work on your site.
- Revolution Slider: You can create attractive slider using this plugin. Help document for this plugin given inside the Inoterior theme package.
- ThemeTechMount Extras for Inoterior Theme: This is required plugin for this Inoterior theme. This plugin contains Custom Post Types and Shortcodes so it will be available if you switch the theme.
- Elementor: This will add drag-n-drop interface to create pages. Help document for this plugin given inside the Inoterior theme package.
- Enhanced Text Widget: An enhanced version of the default text widget where you may have Text, HTML, CSS, JavaScript, Flash, Shortcodes and/or PHP as content with linkable widget title.